

Home | Mastering House Painting Techniques: Tips for a Flawless Finish
Choosing the right paint and properly preparing your walls before painting are crucial steps in achieving a professional-looking finish for your home. The right paint can enhance the overall aesthetic of your space, while proper wall preparation ensures that the paint adheres well and lasts longer. By taking the time to choose the right paint and prepare your walls, you can transform your home and create a beautiful living environment.
Key Takeaways
- Choose the right paint type and finish for your home’s needs and style
- Properly prepare walls by cleaning, repairing, and priming before painting
- Essential tools include brushes, rollers, drop cloths, and painter’s tape
- Cutting in and trimming techniques require a steady hand and patience
- Use a ladder and extension pole for painting high walls and ceilings
Choosing the Right Paint for Your Home
When it comes to choosing paint for your home, there are several factors to consider. First, you need to decide on the type of paint you want to use. There are different types of paint available, such as latex, oil-based, and acrylic. Latex paint is the most commonly used type of paint for interior walls because it is easy to clean up and has low levels of volatile organic compounds (VOCs). Oil-based paint, on the other hand, is more durable and provides a smoother finish, but it takes longer to dry and has a strong odor. Acrylic paint is a water-based paint that offers good durability and a smooth finish.
In addition to choosing the type of paint, you also need to consider the finish and color. The finish refers to the sheen or glossiness of the paint. Common finishes include flat/matte, eggshell, satin, semi-gloss, and high-gloss. Flat/matte finishes are ideal for hiding imperfections on walls, while high-gloss finishes are more durable and easier to clean. When it comes to color, it’s important to choose a shade that complements your existing decor and personal style. Consider factors such as lighting and the mood you want to create in each room.
Preparing Your Walls for Painting
Properly preparing your walls before painting is essential for achieving a smooth and long-lasting finish. Start by cleaning the walls to remove any dirt, dust, or grease. Use a mild detergent and warm water to wash the walls, and then rinse them thoroughly. Allow the walls to dry completely before moving on to the next step.
Next, inspect the walls for any imperfections such as cracks, holes, or peeling paint. Use a putty knife to scrape off any loose or peeling paint, and then fill in any holes or cracks with spackling compound. Once the compound is dry, sand the patched areas until they are smooth and blend seamlessly with the rest of the wall. It’s also a good idea to sand the entire wall lightly to create a rough surface that helps the paint adhere better.
After sanding, it’s important to prime the walls before painting. Primer helps seal the surface and provides a smooth base for the paint. Apply a coat of primer using a brush or roller, and allow it to dry completely before applying the paint.
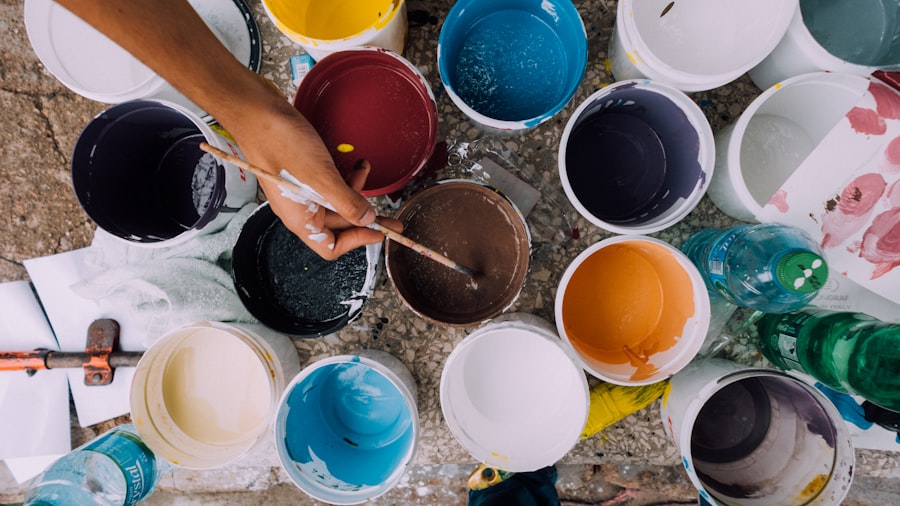
Essential Tools and Materials for House Painting
| Tool/Material | Description |
|---|---|
| Paint Brushes | Used for applying paint to surfaces. Comes in various sizes and shapes. |
| Rollers | Used for applying paint to large surfaces. Comes in various sizes and textures. |
| Paint Sprayer | Used for applying paint to large surfaces quickly and evenly. Requires more setup and cleanup time. |
| Paint Scraper | Used for removing old paint and preparing surfaces for new paint. |
| Sandpaper | Used for smoothing surfaces and removing old paint. |
| Painter’s Tape | Used for masking off areas that should not be painted. |
| Drop Cloths | Used for protecting floors and furniture from paint splatters and spills. |
| Primer | Used for preparing surfaces for paint and improving paint adhesion. |
| Paint | Used for adding color and protection to surfaces. Comes in various finishes and types. |
| Paint Thinner | Used for thinning paint and cleaning up paint brushes and rollers. |
Having the right tools and materials is essential for a successful house painting project. Some of the essential tools you will need include brushes, rollers, drop cloths, painter’s tape, and a ladder or extension pole.
When choosing brushes, opt for high-quality brushes with synthetic bristles for latex paint and natural bristles for oil-based paint. Look for brushes with tapered edges for cutting in and trimming, and choose brushes with different sizes to accommodate different areas of your home.
Rollers are ideal for painting large areas such as walls and ceilings. Look for rollers with a medium nap for smooth surfaces and a longer nap for textured surfaces. It’s also important to choose a roller frame that is sturdy and can hold up well during use.
Drop cloths are essential for protecting your floors and furniture from paint splatters. Opt for heavy-duty canvas drop cloths that are durable and can be easily cleaned.
Painter’s tape is used to create clean lines and protect areas that you don’t want to paint. Look for painter’s tape that is specifically designed for use on walls and can be easily removed without damaging the paint.
Lastly, a ladder or extension pole is necessary for reaching high areas such as ceilings and tall walls. Choose a ladder that is stable and secure, and consider using an extension pole for your roller to reach high areas without the need for a ladder.
Techniques for Cutting in and Trimming
Cutting in and trimming are important techniques for achieving a professional-looking finish. Cutting in refers to painting along the edges of walls, ceilings, and other surfaces using a brush, while trimming refers to painting around windows, doors, and other obstacles.
To cut in effectively, start by loading your brush with paint and removing any excess by tapping it against the side of the paint can. Hold the brush at a slight angle and use short, smooth strokes to create clean lines along the edges. Take your time and be patient to ensure a neat and precise finish.
Painter’s tape can also be used to create clean lines when cutting in. Apply the tape along the edge you want to protect, making sure it is straight and firmly adhered to the surface. Paint up to the edge of the tape, and then remove it while the paint is still wet to reveal a clean line.
When it comes to trimming, use a smaller brush with tapered edges for more control. Start by painting around the edges of windows and doors, making sure to feather out the paint to blend it seamlessly with the rest of the wall. Take your time and be careful not to apply too much paint, as this can lead to drips and smudges.
How to Paint Ceilings and High Walls
Painting ceilings and high walls can be challenging, but with the right tools and techniques, you can achieve a professional-looking finish. Start by using a ladder or extension pole to reach high areas safely. Make sure the ladder is stable and secure, and always follow safety guidelines when working at heights.
When painting ceilings, start by cutting in along the edges using a brush. Use a roller with an extension pole to paint the rest of the ceiling, working in small sections at a time. Apply the paint in a “W” or “M” pattern to ensure even coverage, and then roll over the area in straight lines to smooth out any lines or streaks.
For high walls, use an extension pole with a roller to reach the top areas. Start by cutting in along the edges using a brush, and then use the roller to paint the rest of the wall. Work in small sections at a time, and make sure to blend each section seamlessly with the previous one to avoid visible lines.
Tips for Painting Doors and Windows
Painting doors and windows can be tricky due to their intricate details and moving parts. To achieve a professional-looking finish, start by removing any hardware such as doorknobs or hinges. This will make it easier to paint around these areas and ensure a clean finish.
When painting doors, start by removing them from their hinges if possible. Lay them flat on a drop cloth or sawhorses to make painting easier. Use a brush to paint the recessed areas first, such as panels or moldings, and then use a roller or brush to paint the rest of the door. Work in thin coats and allow each coat to dry before applying the next one.
When painting windows, start by masking off any glass using painter’s tape. Use a brush to paint around the edges of the window frame, making sure to feather out the paint for a smooth finish. Then use a roller or brush to paint the rest of the frame, working in thin coats and allowing each coat to dry before applying the next one.
Mastering the Art of Rolling Paint
Rolling paint is an efficient way to cover large areas such as walls and ceilings. To achieve a smooth and even finish, it’s important to choose the right roller and technique.
When choosing a roller, consider the nap or thickness of the roller cover. A medium nap is suitable for smooth surfaces, while a longer nap is better for textured surfaces. Look for roller covers made of high-quality materials that can hold and distribute paint evenly.
To roll paint effectively, start by loading your roller with paint using a roller tray. Roll the roller back and forth in the tray to evenly distribute the paint on the cover. Remove any excess paint by rolling it on the ridges of the tray.
Start by cutting in along the edges using a brush, and then use the roller to paint the rest of the wall or ceiling. Work in small sections at a time, applying the paint in a “W” or “M” pattern to ensure even coverage. Roll over each section in straight lines to smooth out any lines or streaks.
Avoiding Common House Painting Mistakes
There are several common mistakes that people make when painting their homes, but with some knowledge and preparation, these mistakes can be easily avoided.
One common mistake is not using primer before painting. Primer helps seal the surface and provides a smooth base for the paint. It also helps the paint adhere better and ensures better coverage. Always prime your walls before painting, especially if they are new or have been repaired.
Another common mistake is not allowing enough drying time between coats. It’s important to follow the manufacturer’s instructions for drying times, as applying another coat too soon can cause the paint to peel or bubble. Be patient and allow each coat to dry completely before applying the next one.
Using low-quality tools and materials is another common mistake that can affect the overall finish of your paint job. Invest in high-quality brushes, rollers, and other tools to ensure a professional-looking finish. High-quality tools will hold and distribute paint better, resulting in a smoother and more even finish.
How to Achieve a Smooth and Even Finish
Achieving a smooth and even finish requires the right technique and patience. Start by using a light touch when applying the paint. Apply thin coats of paint and avoid pressing too hard on the brush or roller, as this can create lines or streaks.
It’s also important to avoid overworking the paint. Once you have applied the paint, leave it alone and let it dry. Overworking the paint by going back over it repeatedly can cause streaks or unevenness. If you notice any imperfections after the paint has dried, you can lightly sand them and apply another coat if necessary.
Lastly, make sure to maintain a consistent wet edge when painting larger areas. This means that you should always paint from one wet area to another, overlapping each stroke slightly. This helps to blend the paint and avoid visible lines or streaks.
Maintaining Your Painted Surfaces for Longevity
 Once you have completed your painting project, it’s important to maintain your painted surfaces for longevity. Regular cleaning is essential to keep your walls looking fresh and vibrant. Use a mild detergent and warm water to wash your walls, and avoid using abrasive cleaners or scrub brushes that can damage the paint.
In addition to cleaning, it’s also a good idea to touch up any areas that may have been damaged or scuffed over time. Keep some extra paint on hand for touch-ups, and use a small brush to carefully apply the paint to the affected areas.
Choosing the right paint and properly preparing your walls are crucial steps in achieving a professional-looking finish for your home. By following the tips and techniques outlined in this article, you can tackle your own house painting projects with confidence. Remember to choose high-quality tools and materials, take your time, and be patient. With a little practice and attention to detail, you can transform your home and create a beautiful living environment.
If you’re looking for expert house painters in Costa Mesa, house painters in Tustin, or house painters in Huntington Beach, you’re in luck! ColorKraft Homes offers top-notch painting services in these areas. Whether you need interior or exterior painting, their skilled team of professionals will ensure a flawless finish. In fact, they have recently published an article on their website that provides valuable insights into the latest house painting techniques. To learn more about how to achieve a professional-looking paint job, check out their article house painting techniques.
FAQs

What are some common house painting techniques?
Some common house painting techniques include brushing, rolling, and spraying. Each technique has its own advantages and disadvantages, and the choice of technique depends on the type of surface being painted and the desired finish.
What is brushing?
Brushing is a painting technique that involves using a paintbrush to apply paint to a surface. It is a traditional technique that is often used for painting trim, corners, and other areas that are difficult to reach with a roller or sprayer.
What is rolling?
Rolling is a painting technique that involves using a paint roller to apply paint to a surface. It is a fast and efficient technique that is often used for painting large areas such as walls and ceilings.
What is spraying?
Spraying is a painting technique that involves using a paint sprayer to apply paint to a surface. It is a fast and efficient technique that is often used for painting large areas such as walls and ceilings, as well as for achieving a smooth and even finish.
What are some tips for achieving a professional-looking paint job?
Some tips for achieving a professional-looking paint job include properly preparing the surface before painting, using high-quality paint and tools, applying paint in thin, even coats, and allowing each coat to dry completely before applying the next one. It is also important to use proper painting techniques and to avoid common mistakes such as overloading the brush or roller with paint.
Page Design by: Website Creators Near me